Simple, secure, sensible – Koroush Saraf, Fortiner VP of Product Management, emphasized these words in his recent MFD3 presentations. While any vendor can claim their products share these attributes, it’s usually the complexity of workflow that reveals the betrayal of one or all of these characteristics. Watching this Mobility Field Day demo, however, the simplicity of setting up a basic Fortinet WLAN SSID, applying security policies, and even setting up automation for quarantining an infected machine boiled down to just a few steps.
Step one: Create your SSID.
In Fortinet world, creating an SSID creates a virtual interface. At first, this seems like a strange construct to be involved in a WLAN setup process, but later in the process, the logic and flexibility of having this virtual interface becomes apparent.
To create your basic SSID, navigate to WiFi & Switch Controller, click on SSID, click Add New. You can select if this SSID will be a Tunnel, Bridge, or Mesh SSID, as well as configure parameters such as IP address, DHCP server options, Default Gateway, DNS servers, etc…
Keep in mind that to avoid clutter, the GUI presents the essential and the most commonly used options for configuration. Some more advanced configuration may not be seen in the GUI but available via CLI.
Step 2: Attach or create an AP Profile.
The FortiAP Profile is where things like radio bands, transmit power, channel and channel width, etc… are configured and controlled in a manner that can be applied to multiple APs.
To create a new AP profile, navigate to WiFi & Switch Controller, and click on FortiAP Profiles, click Add New. 
To attach an already created AP Profile to an AP, navigate to WiFi & Switch Controller, click Managed FortiAPs, select your AP, and apply the appropriate profile to the AP. This screen is also where you would configure AP specific options that would not apply to all APs using the profile selected. 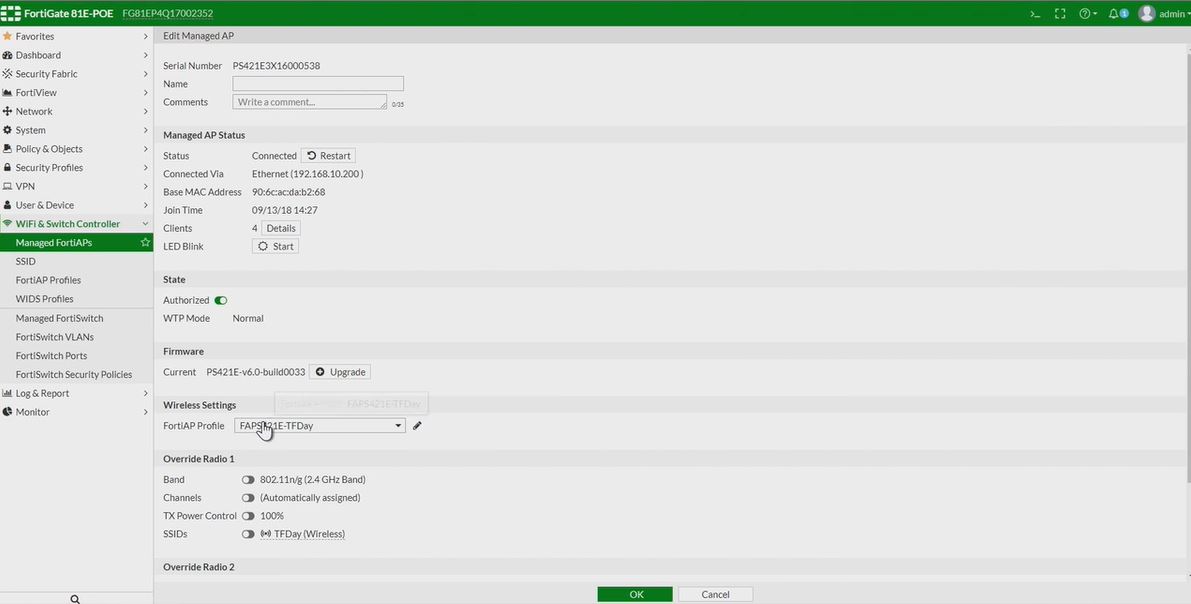 Note, this assumes you have already setup your basic controller parameters so that APs can be automatically discovered. For more information, see the documentation cited at the end of this post.
Step 3: Create interface policies.
This step brings together the SSID virtual interface created and the security policies that need to be applied to the SSID. The virtual interface allows for the straight-forward application of security policies such as allowed/denied ports and protocols, along with UTM features and application restrictions.
For engineers that have configured Fortigate firewalls, this part of the process will feel the most familiar since it’s leverages the same process of policy creation used to create traditional firewall rules. 
Bonus step: Configuring an automation alert for compromised clients.
Now that you have your SSID and AP online, you can head over to Automation and quickly setup workflow for what should happen when the Fortigate sees a compromised host. You can see from the screen shot below that not only can the host be quarantined automagically, but an email could be sent to inform those taking the calls from the angry virus-spreading-machine owners that these machines have been blocked. Note this type of automation can apply not just to WLAN clients, it is a feature that can be used globally for all detected endpoints.
To see this demo in action, check out this MFD presentation in which Fortinet makes a compelling case for the idea that the lives of IT engineers shouldn’t be made so difficult all the time. Now if only all IT vendors thought this way…
And for even more Forti-content, check out these posts from fellow delegates:
Lee Badman – Clarity and Confusion- Fortinet and Arista at Mobility Field Day 3
Scott Lester – Forti What
Jim Palmer – A Story of Three Companies
Note: This post is based on the basic setup and topolgy given in the video presentation, for more advanced configuration information, please check out Fortinet’s documentation that can be found here. Also, Fortinet has an pretty awesome demo site here which allows you to log in and look around in pretty much any Fortinet product you’d like to see.
Disclaimer: While Mobility Field Day, which is sponsored by the companies that present, was very generous to invite me to the fantastic MDF3 event and I am very grateful for it, my opinions are totally my own, as all redheads are far too stubborn to have it any other way.
Published 9/30/2018


