“Thirteen hundred APs, no open support tickets” – achieving quality in wireless networks

“Thirteen hundred APs, no open support tickets,” Sudheer Matta, VP of Products for Mist Systems, boldly stated during his MFD3 presentation.  At the time, he was referencing one of their largest customers specifically, but the company’s desire to prevent bugs, create high quality customer experiences, and resolve issues quickly were principles that permeated the discussions with Mobility Field Day delegates.

Mist leverages several key components in order to pull off their customer focused reliability, visibility, and proactive troubleshooting of the wireless network.

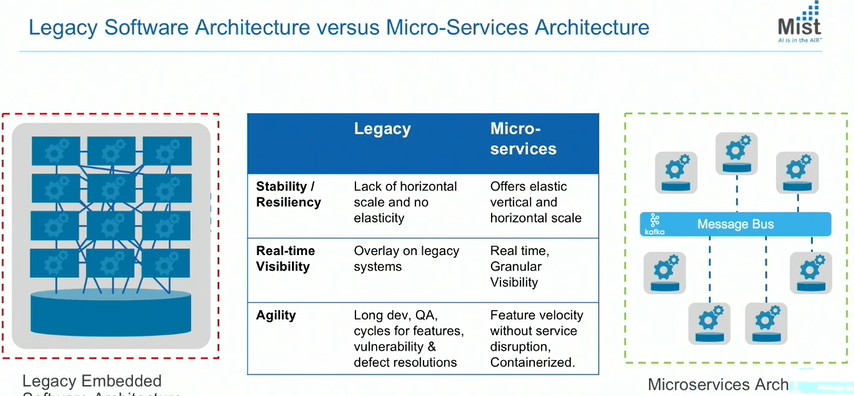
Cloud-based micro-services architecture.  This modern approach to building systems is part and parcel of what many cloud companies have been doing with their software architecture over the last few years.  Instantiating distributed services and leveraging APIs between these services is foundational to providing the kind of resiliency and redundancy cloud makes possible and Mist credits this architecture with how they are able to push out new features, fixes, and services weekly without causing any data plane outages for customers.

In his presentation, Sudheer shares an impressive case of how Mist was able to do a complete restore for a customer that had deleted their entire controller infrastructure. All the controllers and services were back online in less than 2 hrs with no access point reboots or data plane outages, a feat Sudheer also credits to Mist’s distributed architectural approach.

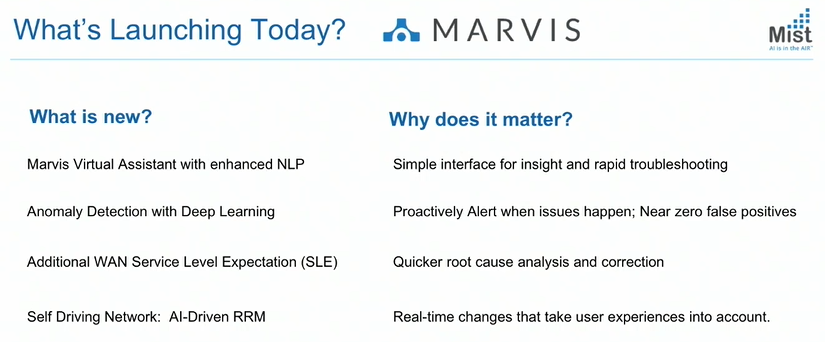
Analytics. These days collecting data is table stakes, the real advancement is in building better algorithms that provide useful information to customers. Mist calls these, “actionable insights” and they are more than just increasing the noise floor with more alerts. Mist believes their actionable insights are so dead on that they’ve announced proactive anomaly detection, meaning the system will open a ticket on your behalf when an issue is detected.

And the analytics don’t stop with just ticket opening – MARVIS (Mist’s AI) is getting several feature enhancements focused on improving the troubleshooting process, reducing analysis time, and improving RRM.

A culture of attention to detail. After watching Mist’s MDF3 presentations, I would describe their business model as “just good enough is not good enough for us.”

Besides a distributed architecture designed to minimized the number of bugs and the impact of those bugs that do make it into the system, issues are expected to be resolved quickly and not allowed to fester or be ignored.  A clear emphasis is placed on quality and usability of the system, from the architecture to the user experience.

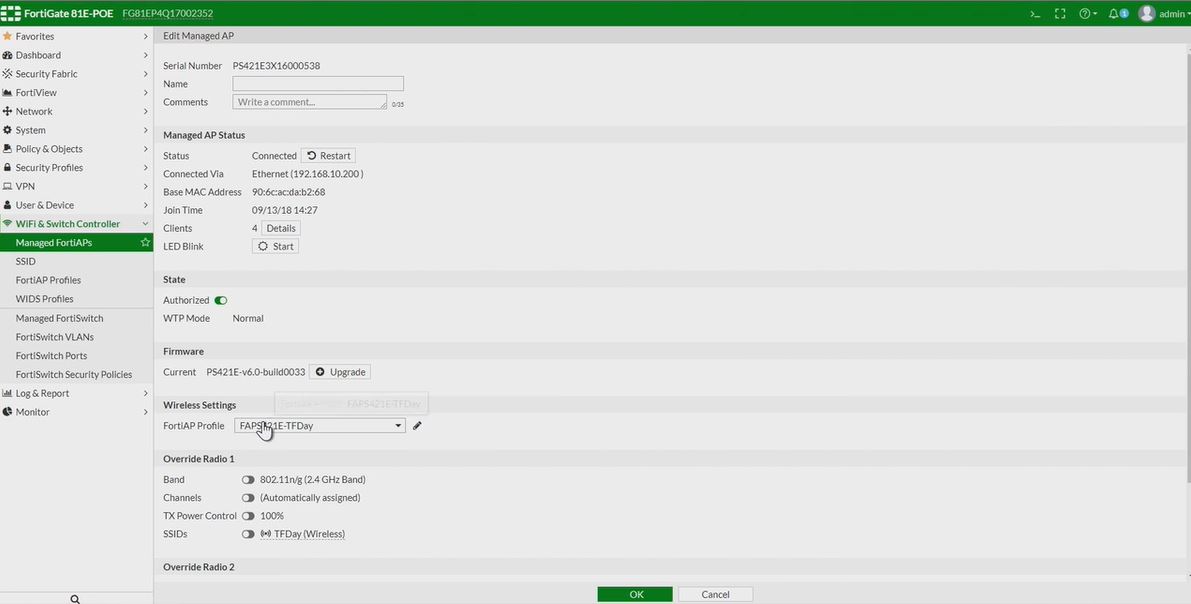
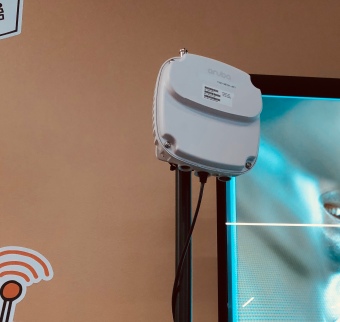
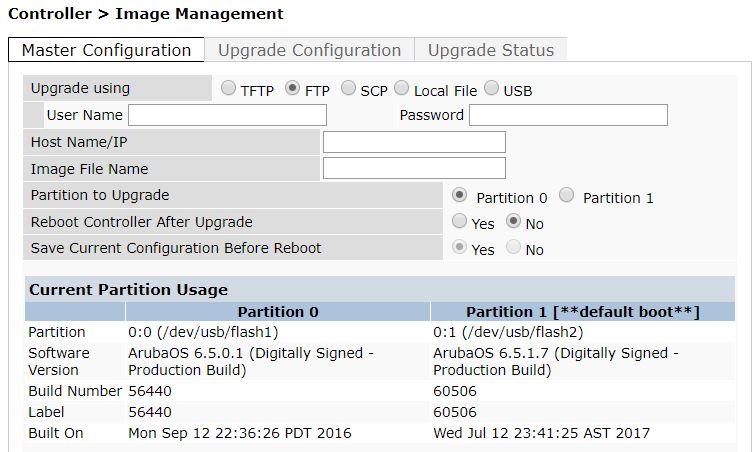
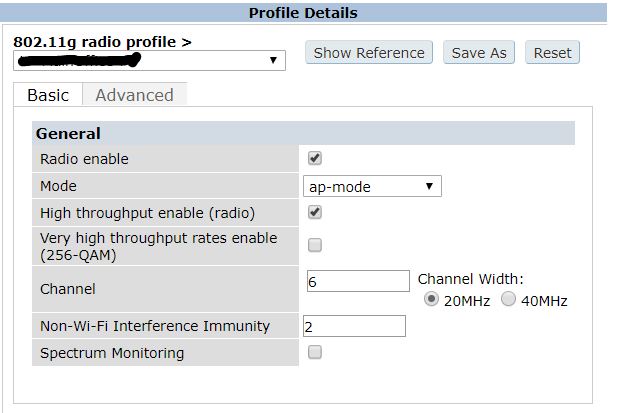
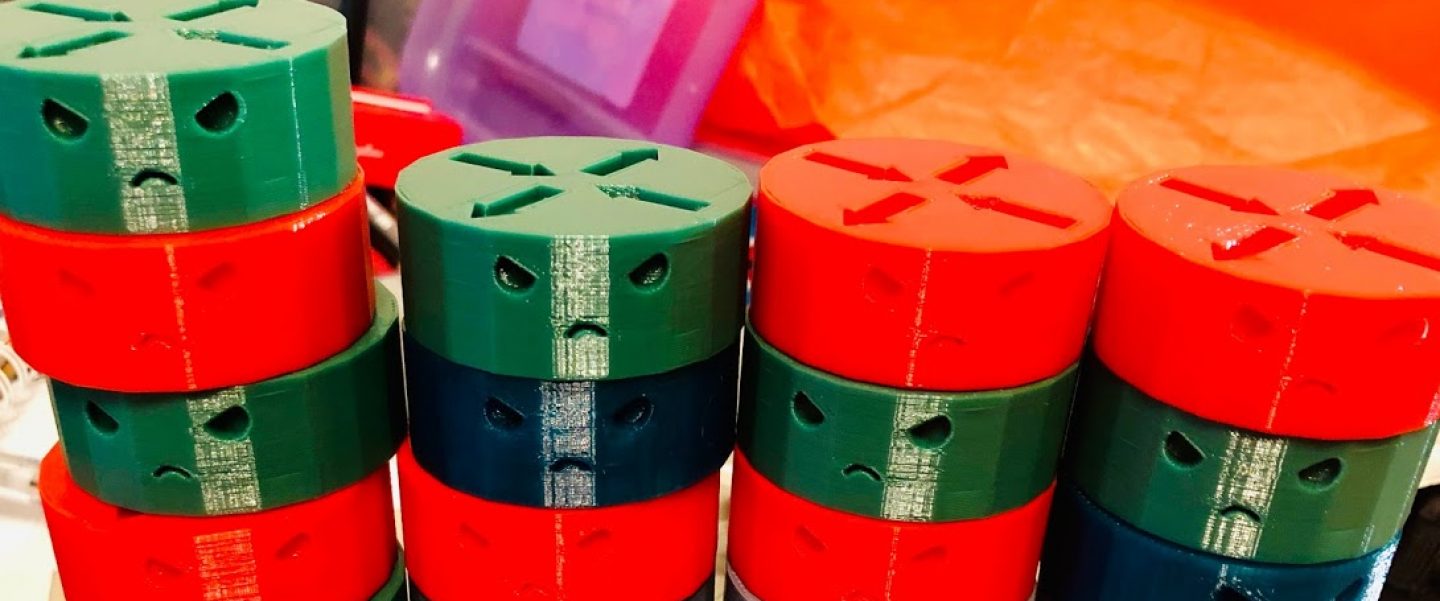
Mist is also listening both to its customer base as well as wireless engineers. An improved adapter bracket, the transparency with firmware version issues, the coming soon red and green buttons, and the constant tuning of the virtual assistant were just a few indicators from the presentations that customer experience and usability not only matter, but are at the top of the priority list.

For more Mist goodness, be sure to check out these posts:

@badger-fi – Mom’s love Mist

@rowelldionicio – Demistifying Wi-Fi Issues

@Drew_CM – Mist Enhances Machine Learning Capabilities To Improve WLAN Performance, Troubleshooting

@theitrebel – MDF Day 1 Recap

Disclaimer: While Mobility Field Day, which is sponsored by the companies that present, was very generous to invite me to the fantastic MDF3 event and I am very grateful for it, my opinions are totally my own, as all redheads are far too stubborn to have it any other way.

Published 10/7/2018


Intro into Fortinet WLAN configuration

Simple, secure, sensible – Koroush Saraf, Fortiner VP of Product Management, emphasized these words in his recent MFD3 presentations. While any vendor can claim their products share these attributes, it’s usually the complexity of workflow that reveals the betrayal of one or all of these characteristics. Watching this Mobility Field Day demo, however, the simplicity of setting up a basic Fortinet WLAN SSID, applying security policies, and even setting up automation for quarantining an infected machine boiled down to just a few steps.

Step oneCreate your SSID.

In Fortinet world, creating an SSID creates a virtual interface.  At first, this seems like a strange construct to be involved in a WLAN setup process, but later in the process, the logic and flexibility of having this virtual interface becomes apparent.

To create your basic SSID, navigate to WiFi & Switch Controller, click on SSID, click Add New.  You can select if this SSID will be a Tunnel, Bridge, or Mesh SSID, as well as configure parameters such as IP address, DHCP server options, Default Gateway, DNS servers, etc…

Keep in mind that to avoid clutter, the GUI presents the essential and the most commonly used options for configuration. Some more advanced configuration may not be seen in the GUI but available via CLI.

Step 2: Attach or create an AP Profile.

The FortiAP Profile is where things like radio bands, transmit power, channel and channel width, etc… are configured and controlled in a manner that can be applied to multiple APs.

To create a new AP profile, navigate to WiFi & Switch Controller, and click on FortiAP Profiles, click Add New

To attach an already created AP Profile to an AP, navigate to WiFi & Switch Controller, click Managed FortiAPs, select your AP, and apply the appropriate profile to the AP. This screen is also where you would configure AP specific options that would not apply to all APs using the profile selected. Note, this assumes you have already setup your basic controller parameters so that APs can be automatically discovered.  For more information, see the documentation cited at the end of this post.

Step 3: Create interface policies.

This step brings together the SSID virtual interface created and the security policies that need to be applied to the SSID.  The virtual interface allows for the straight-forward application of security policies such as allowed/denied ports and protocols, along with UTM features and application restrictions.

For engineers that have configured Fortigate firewalls, this part of the process will feel the most familiar since it’s leverages the same process of policy creation used to create traditional firewall rules. 

Bonus step: Configuring an automation alert for compromised clients.

Now that you have your SSID and AP online, you can head over to Automation and quickly setup workflow for what should happen when the Fortigate sees a compromised host. You can see from the screen shot below that not only can the host be quarantined automagically, but an email could be sent to inform those taking the calls from the angry virus-spreading-machine owners that these machines have been blocked.Note this type of automation can apply not just to WLAN clients, it is a feature that can be used globally for all detected endpoints.

To see this demo in action, check out this MFD presentation in which Fortinet makes a compelling case for the idea that the lives of IT engineers shouldn’t be made so difficult all the time. Now if only all IT vendors thought this way…

And for even more Forti-content, check out these posts from fellow delegates:

Lee BadmanClarity and Confusion- Fortinet and Arista at Mobility Field Day 3

Scott LesterForti What

Jim PalmerA Story of Three Companies


Note: This post is based on the basic setup and topolgy given in the video presentation, for more advanced configuration information, please check out Fortinet’s documentation that can be found here. Also, Fortinet has an pretty awesome demo site here which allows you to log in and look around in pretty much any Fortinet product you’d like to see.

Disclaimer: While Mobility Field Day, which is sponsored by the companies that present, was very generous to invite me to the fantastic MDF3 event and I am very grateful for it, my opinions are totally my own, as all redheads are far too stubborn to have it any other way.

Published 9/30/2018

Solving 802.11ad challenges

The 802.11ad (60GHz) market has been interesting to watch, especially now that products utilizing the technology are becoming more prevalent.  Vendors leveraging 802.11 in a frequency band whose propagation properties differ significantly from the traditional 802.11 bands of  2.4 and 5GHz mean new engineering challenges to overcome.

The AP-387 point to point unit announced by Aruba earlier this year seeks to address these challenges in a few interesting ways.  Rain fade is primary concern when working with high frequencies such as 60GHz.  In order to combat this, the AP-387 has two radios, a 60GHz and a 5GHz radio, with the unit aggregating the throughput of both radios.

Should a storm roll through, the unaffected 5GHz radio will sustain the link, and the access point’s programming will dynamically adjust the amount of traffic sent to the deteriorated 60GHz radio.   Additionally, the physical design of the AP includes a lip that acts as an umbrella, keeping sheets of rain from coating the 60GHz antenna.

387-picture

The other key and quite snazzy feature of this PTP unit is the self aligning properties of the 60GHz radio, and it’s ability to dynamically scan and realign the link after heavy winds or vibrations.  Inside the access point are two 60GHz antenna elements and a chipset that allows the radio to scan +/- 40 degrees horizontally and +/- 10 degrees vertically in order to acquire or realign the link.

With such a wide scanning angle and the ability to self acquire the link, the need for precision in line of sight deployments is severely lessened.  I love the way Eric Johnson (Director of Product Management for Aruba) put it in his Mobility Field Day 3 presentation, “only minutes to deploy and hold my beer.”

The AP-387 has an extremely narrow (10 degree) beam-width, meaning units could theoretically be placed ~5 meters apart and still use the same channel. PoE+ is recommended for the AP-387, but it will operate with the 60GHz radio backed off by 3 db if 802.3af is used.

It’s important to note that there is a 500 meter distance limitation with these units..The product development reasoning behind the distance limitation is due to size and cost considerations of the high gain antenna elements for the 60GHz radios.  The current unit is rather small in comparison to other 60GHz products in this space, as you can see from the picture below.

AP-387

If you are interested in learning more about this 802.11ad PTP solution, I highly recommend this post  by

Aruba Powering Next Gen Mobility with Eric Johnson and Onno Harms from Stephen Foskett on Vimeo.


Disclaimer: While Mobility Field Day, which is sponsored by the companies that present, was very generous to invite me to the fantastic MDF3 event and I am very grateful for it, my opinions are totally my own, as all redheads are far too stubborn to have it any other way.

Published 9/23/2018

Minor version upgrades for Aruba controllers, version 6.5.x

If you tuned in for the last post, you’ll remember that in all the wireless mesh troubleshooting fun, a wireless controller upgrade was required.  Today’s post outlines the upgrade process from 6.5.0.1 to 6.5.1.7 with a primary and secondary controller. As always when dealing with upgrades, your mileage may vary. Never forget to read the release notes, and when in doubt, contact TAC.

As with any upgrade, the release notes often contain subtle details, and these are typically details that bite back if you miss them.  The notes for 6.5.1.7 are pretty straightforward, but they do include exciting, not to be missed, caveats if upgrading from 6.4.x, as well as some solid tips for the upgrade.

The best practice advice in the notes includes steps such as confirming enough memory and storage space for the controller, making a backup of the configuration, and noting the number of active access points before upgrading. All of these suggestions make prudent sense and the commands to do so are listed in the guide.

You can use a FTP, TFTP, SCP, local file, or USB to do this upgrade, but the guide warns against using a Windows-based TFTP server. I used FileZilla FTP server.

Once you’ve downloaded the image file from Aruba and your pre-upgrade checklist is complete, navigate to Maintenance > Controller > Image Management -> Master Configuration.

Pick the file loading option you want to use for the upgrade, then fill in the required details for the transfer. Choose the non-boot partition for Partition to Upgrade. This will load the new software image to the inactive partition. If you are uncertain which one is the boot partition, look under Current Partition Usage, one partition will be marked **default boot**. You will want the other one.

Be sure that Reboot Controller after Upgrade is set to No, unless you have a single controller and eat danger for breakfast. Select Yes for Save Current Configuration Before Reboot, and click Upgrade.

At this point, you rinse and repeat for the other controller(s).  Once the controllers have the upgrade version loaded, you reboot the master, and simultaneously reboot the other controller. In voice upgrade world, you have been well trained to wait FOREVER for all the services to come back up on the primary before even considering a reboot of secondaries, but in Aruba wireless world, simultaneous is written in the guide. See excerpt below from the 6.5.1.7 Release Notes available on the Aruba support site.

TAC did ease my anxiety over this simultaneous reboot thing by letting me know no harm would be caused if I wanted to wait for the master to come back online completely before proceeding.

After the controllers reboot and are back online, access points begin getting their new firmware and rebooting. Once the dust settles, you should end up with the same number of active APs as you noted in the beginning. Then it’s all testing and confirming access points are happy, clients are connecting, and that all is well your WiFi world.

Published 9/11/2017

Wireless troubleshooting – mesh access points stop accepting clients

Today’s topic initially spawned from mesh troubleshooting.  If you’ve worked with mesh much, you may have just thrown up a little and are frantically trying to close the browser tab that led you here, and that’s totally understandable.  For my voice engineer readers, mesh troubleshooting is one of the few things in the universe that can generate pain and suffering in levels akin to troubleshooting fax machines.

Given typically vague rumors and incomplete reports of intermittent connectivity issues at a mesh site, my amazing coworker was able to hone in on the root problem: various APs in the mesh intermittently stopped accepting clients on their 2.4 GHz radios. Being as 5 GHz was limited to back-haul traffic only, this was definitely wreaking some havoc on the overall deployment.

From the controller, disabling and re-enabling the radio on the 802.11g radio profile* for the affected APs served as a workaround while TAC was consulted. Mysteriously, other mesh deployment sites with the same model AP and code were not seeing this issue. As a note, these APs were all Aruba 274s and controller code version 6.5.0.1, but spoiler alert, the model AP wasn’t the issue.

Fast forward to TAC and some show/debugs commands later, the APs that randomly stopped accepting clients had enormous amounts of 2.4 radio resets, indicating this bug discussed here.

This issue affects not only 274s, but other models of access points. The bug does not appear to affect all of any model, just a small percentage of access points when it does show up.

If you think you might be experiencing this issue, take a look at the output of these commands and look for a crazy high number of radio resets.  How high?  Since the radio appears to be resetting practically every second, the radio reset number is noticeably and ridiculously large.**

show ap debug radio-stats ap-name NAME-OF-AP radio 0 advanced
show ap debug radio-stats ap-name NAME-OF-AP radio 1 advanced
show ap debug system-status ap-name NAME-OF-AP

The fix is in code versions 6.5.0.4 or 6.5.1.3 or later.  We landed 6.5.1.7 and the issue looks to be properly squashed. The upgrade process, which I’ll outline in another brief post, was a simple and straightforward, and being a veteran of many a lengthy and challenging voice upgrades, I found this to be refreshingly delightful and far less sanity taxing.

* Enabling the radio can be done on the 802.11g radio profile, on the Basic tab.  Uncheck the Radio enable box, click Apply.  Check the Radio Enable box, click Apply.  These mesh APs each have their own AP specific profile and this action only affects the individual AP.  If your AP doesn’t have an AP specific profile, be sure to know what APs you are impacting when you do this. Also of note to this case, some experiencing this issue found disabling ARM provided temporary relief, but didn’t do the trick in this deployment, as ARM was already disabled and the issue still occurring.   

Radio enable

**Below is an example of the number of resets seen for one of the affected APs:

Interface Rx_pkts Rx_errors Rx drops Tx_pkts Tx_errors Tx_drops Resets
——— ——- ——— ——– ——- ——— ——– ——
wifi0 174210795 15727807 0 451900531 103 0 9
wifi1 9166677 133711103 0 32655175 842870 0 211094


Published 09/05/2017

Enforcing wireless SSID policy using CounterACT NAC and Airwatch MDM module

Recently, I tested out policy enforcement on corporate iPads using Forescout’s CounterACT and its optional Airwatch integration module*.  I’ll be sharing a few things I learned along the way, especially since documentation of this setup is rather sparse (read practically non-existent).

To get this setup, I installed the Airwatch module, downloaded from the Forescout site. You’ll need a valid login, but once you’ve downloaded the file, you can install the module from the CounterACT client by going to Tools -> Options -> Plugins.  After installing the module, there’s a few pieces of integration information that can be found in the Airwatch portal itself.  In the CounterACT client, you can right-click the AirWatch MDM plug-in, click Configure, and enter the required information.

Once you’ve completed the integration information, be sure to start the AirWatch MDM Plugin – it doesn’t automagically start and results are particularity disappointing unless it’s running, as I experienced myself.

At this point it is a good idea to use the Test option for the Plugin and confirm you see a Test Passed in your output.

You can also double click the MDM Integration Module and you should see some happy little Airwatch managed devices listed.

Now it’s time to set up a couple of policies. My first policy matched on Network Function – Mobile Device and Airwatch Enrollment Status – Enrolled.  If CounterACT finds these two criteria to be true, it should drop the tablet into my Corporate Hosts group I designated – a group which is allowed the appropriate network access for a corporate managed device.

My second policy was designed to match unmanaged tablets and phones – those not enrolled in Airwatch. The policy checks if the Device Function is Mobile Device, and has an action of WLAN Block.

I thought this would be it and victory would be mine, but alas the WLAN block wasn’t working.

I received increasingly annoying errors about not being able to reach the wireless controller to enforce the policy.  After testing the wireless controller under Plugins, I could see I was failing on WLAN Role and on Write Permissions.   In an act of sheer grasping at straws, I removed the wireless controller, which had been added as it’s VIP (HA) address, and instead added the wireless controller as its “real” IP address. That did the trick. All tests passed, victory dance cued up.

But then I discovered the extremely disturbing flaw in my perfect policy plan.  Once a device was identified as not managed and very successfully blocked, it became blocked from all SSIDs. Meaning no employee network AND no guest network for the device. The controller wouldn’t accept the device as a client. Period. Cue sad trombone instead.

Reworking the policy logic, I instead implemented the WLAN Role change instead of the WLAN Block action.

I selected a guest role configured in the Aruba controller that locks the user down, blocking access to corporate resources.  You can see below the successful policy enforcement.

Later, my awesome coworker was able to set up an HTTP notification action for the policy so that the users see a web page informing them of the error of their ways and instructing them to change SSIDs to the guest wireless network to be redeemed.


Now about that victory dance…


Published 05/26/2017

*Anyone who has had to deal with 802.1X certificate enrollment for iPads knows what a PITA the experience is – the setup being tested here allowed for PEAPv0 (EAP-MSCHAPv2) authentication using Microsoft NPM, with the goal that any non-corporate device would have no access to corporate resources. There are other ways to skin this ugly iPad certificate cat, and if you’d like to list the ones you’ve had the most success with in the comments, I am sure others would appreciate the insight.


Capturing 802.11 management frames on Windows using Acrylic WiFi Pro

Studying for CWAP, I embarked on a mission to capture 802.11 management frames using my Windows laptop. For those with MacBooks that do this natively, read no further, just keep on perfecting that smug look of disdain with a slight hint of pity for the rest of us Microsoft peasants.

For those whose laptops aren’t fruit branded, but you still want to capture 802.11 frames in promiscuous mode, this is the post for you.  Especially if you can’t quite justify the cost an AirPcap adapter for study purposes.

While researching alternatives to pricey AirPcap adapters, I came across this Acrylic WiFi Professional post on their option for an NDIS driver. This driver allows you to capture in promiscuous mode, so you can capture all that management frame goodness, but without the AirPcap adapter.  I checked out the supported USB wireless options, ordered one off the list from Amazon (I picked the NETGEAR A6200), and downloaded a free trial of Acrylic WiFi Pro to get started.

The installation of Acrylic Pro is straightforward, as is turning on Monitor Mode when you know where to look. By default, Monitor Mode is turned off and the NDIS driver is not installed.  Just click the menu in the right corner, and select Change to get to the Monitor Mode settings.

mode


Select Monitor Mode On and select Install the NDIS driver.  You’ll get a warning message that you might crash your system and you’ll need to acknowledge that you are completely okay with this*.

NDIS warning message


Once the driver is installed you can swap over to the Packet Viewer using the icon in the top tool bar or by clicking Packet Viewer from the menu.  You will also see that you are in Monitor Mode and can select to change out of Monitor Mode if so desired.

Packet Viewer Window


While all of this is really super cool, I was extremely  interested in capturing these frames inside of my most familiar tool of packet sniffing choice, Wireshark.

Unfortunately, I didn’t see the NDIS driver as an available capture interface when I launched the Wireshark application. This post by Acrylic reminded me why. I needed to launch Wireshark with Run As Administrator, even though I am a local administrator on the laptop**.   Once I did this, I could select the Acrylic NDIS NETGEAR A6200 WiFi Adapter and start capturing wireless management frames.

Wireshark Capture Interfaces


I could also select the Wireless Toolbar in Wireshark and see that the NDIS driver emulating an AirPcap adapter.

wiresharkwirelessmenu

wiresharkwirelesstoolbar


Unfortunately, I still had one tiny problem at this point.  Every time I launched the Wireshark application, my built-in wireless card immediately quit passing all traffic. Not exactly ideal for productivity.

Easy fix, though, if you encounter this issue.  Head over to the settings for the Network Adapter, uncheck the Tarlogic NDIS Monitor Driver for the built-in adapter, and the problem is solved.

Change Adapter Settings

I would be remiss not to point out that there are limitations to this NDIS driver. For instance, there is no support for 40 or 80 MHz channels at this time.  But for my CWAP study purposes, this is working quite well and saves me a bit of cash.  Also, Ben Miller did a great write up on this very same subject, which, of course, I found just AFTER I went through this process and drafted this post. The universe has quite the sense of humor like that.


Published 2/7/2017

*Do this at your own risk, please don’t blame me for your system crash, there’s a good chance I’ll just point and laugh…

**If you need to know how to set a program to always run as administrator in Windows 10, look here.


Intro to MSE: The setup wizard

Not only do I stumble around firewalls these days, but I also get to fumble my way through the vast world of wireless as well. Currently part of a project to upgrade WCS and 4400 series controllers to the latest and greatest, I found myself installing MSE virtual appliance and ran across a few oddities.

I ended up using this guide MSE Software Release 7.2 Virtual Appliance Configuration and Deployment Guide even though I was installing 7.4, frankly because I couldn’t find the equivalent guide for 7.4 with step by step screen shots and instructions that engineers like me cling to.  There is this 7.6 guide, but it doesn’t have quite the same level of detail on the wizard process as the 7.2 version.

Couple of notable steps given my experience going through the setup wizard for MSE:

When the documentation says to change the root password and the minimum password length is 8 characters, it’s mostly lying.  Fourteen was required, as well as some complexity requirement that took a bit to dechiper. I tried a zillion passwords with every category of complexity I could summon until the security gods finally accepted my offering.  Upon consulting the oracle that is Google to find out what in the wild world of the obvious I was missing, I found this support form post that suggests I could have skipped this step, changed the security restrictions in a future step, and then re-ran the wizard. Fabulous.

The other thing to take note of is that when the installation finishes, even after rebooting the box, the MSE service doesn’t automatically start. This is mentioned in some documents but not others. If you don’t start the MSE service, when you go to add the MSE to the Prime Infrastructure server, you will get an error that the MSE server doesn’t much like you and won’t be talking to you.

The fix for this issue is rather simple, log in as root and issue the command: service msed start

After this, I was able to add the MSE to Prime without a problem. Woot.

Published 2/27/2014