Welcome to a quick How To post for converting a shiny new Aruba Instant Access Point (IAP) into a shiny new Campus Access Point (controller based AP). This applies to access points that are not UAP. For more info on the UAP process and which APs are UAP, check out this awesome post by @theitrebel.
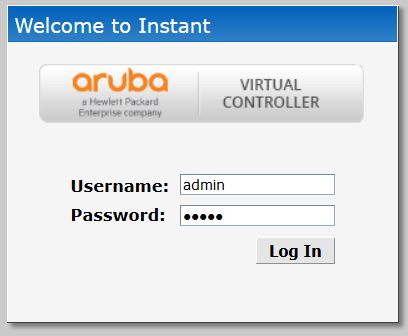
Just power up your access point and once it’s booted, look for an “Instant” SSID. Connect to this SSID, open a browser, and you will be redirected to a login page* for the controller. The default login is admin/admin.
Next, click on the Maintenance link, and then navigate to the Convert tab. From the drop down, select Campus APs managed by a Mobility Controller.

Enter the IP or hostname of your controller and click the Convert Now button. Click the confirmation and the conversion will begin. Your AP will reboot, begin anew as a Campus AP, and join the controller you specified. This, of course, assumes you’ve got your controller configured correctly and licensing all in order.
If you’d like to see a short video demonstrating this process, I found this quick video posted by Sean Rynearson: https://youtu.be/Wfl6gYPuyVs
Bonus: If you have a bunch of IAPs to convert, I recommend reviewing this post on the subject, it’ll save you some time: http://community.arubanetworks.com/t5/Controller-less-WLANs/How-to-convert-a-whole-IAP-cluster-as-Campus-APs/ta-p/215053
*if you are not automagically redirected when you join the SSID and open a browser window, try manually going to this URL: https://instant.arubanetworks.com:4343/
Published 10/10/2017
